
A Luscious Chocolate & Peanut Butter Delight for Every Occasion
Ready to wow your family or guests with a decadent, no-fuss dessert that looks impressive but is surprisingly easy to make? This Reese’s Peanut Butter Cup Roll Cake brings together rich chocolate cake, creamy peanut butter filling, and crunchy Reese’s candy in one heavenly swirl. Perfect for birthdays, holidays, potlucks, or any time you’re craving a sweet and satisfying treat.
Let’s get rolling—literally! Try this indulgent roll cake today and treat yourself to a slice of bliss.
Introduction
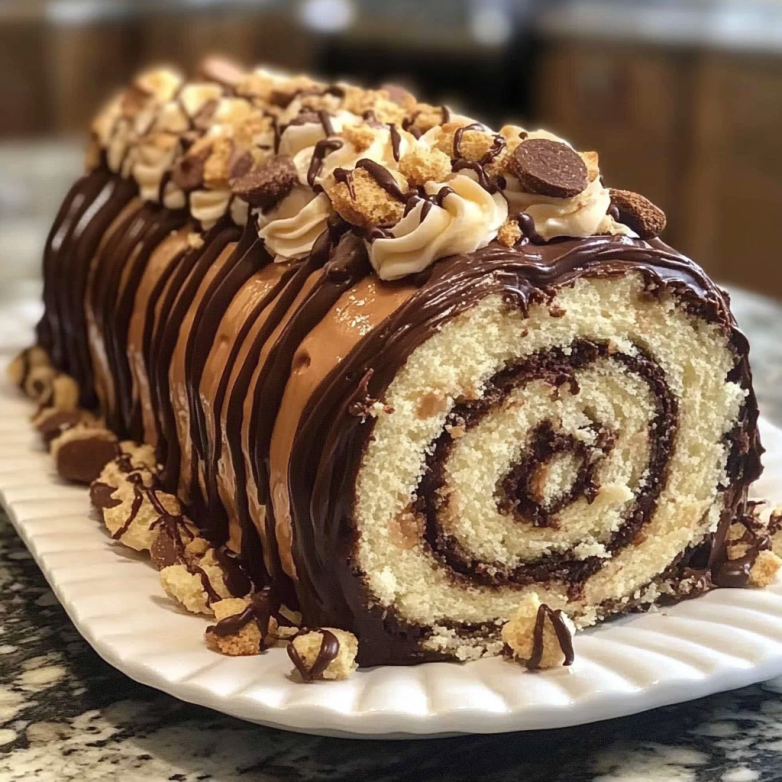
The combination of chocolate and peanut butter is an all-time favorite, and this Reese’s Peanut Butter Cup Roll Cake takes that classic pairing to the next level. Imagine soft, moist chocolate cake wrapped around a whipped peanut butter filling, then studded with chunks of Reese’s peanut butter cups and topped with more candy and cream.
Whether you’re hosting a party or just looking to treat yourself and your loved ones, this roll cake is guaranteed to be a hit. It’s made easier by using a boxed cake mix, yet it delivers bakery-quality results in both flavor and presentation.
Tools Needed, Serving Size, and Cooking Time
Serves: 10
Prep Time: 20 minutes
Bake Time: 15 minutes
Cooling + Chill Time: 1 hour 10 minutes
Total Time: 1 hour 45 minutes
Tools You’ll Need:
- 10×15-inch jelly roll pan
- Parchment paper
- Mixing bowls
- Electric hand mixer or stand mixer
- Rubber spatula
- Offset spatula (optional for spreading filling)
- Cooling rack
- Knife or cake slicer
Ingredients
- 1 box chocolate cake mix (plus ingredients listed on the box — typically eggs, water, and oil)
- 1 cup creamy peanut butter
- 2 cups whipped topping (such as whipped cream or non-dairy topping)
- 1 cup chopped Reese’s peanut butter cups (plus more for garnish)
Step-by-Step Instructions
Step 1: Preheat the Oven
Begin by preheating your oven to the temperature specified on your chocolate cake mix box, usually 350°F (175°C). Line a 10×15-inch jelly roll pan with parchment paper and lightly grease it to prevent sticking. The parchment makes rolling and lifting the cake much easier.
Step 2: Prepare the Cake Batter
In a large mixing bowl, combine the chocolate cake mix with the ingredients listed on the box — typically eggs, water, and oil. Use an electric mixer to beat the batter until smooth and lump-free. Pour the batter into your prepared jelly roll pan, spreading it evenly with a spatula to ensure a consistent thickness.
Step 3: Bake the Cake
Place the pan in the oven and bake according to your cake mix’s directions for a thin sheet cake. This usually takes around 12–15 minutes. Keep a close eye on the cake toward the end — overbaking will cause it to dry out and crack when you roll it.
Step 4: Roll the Cake While Warm
This is the most important step for achieving a crack-free roll. While the cake is still warm, lift it using the parchment paper and carefully roll it from the short side into a tight spiral, parchment and all. Set it seam-side down and allow it to cool completely while rolled. This helps the cake “remember” its rolled shape, reducing the risk of breaking later.
Step 5: Make the Peanut Butter Filling
While the cake cools, prepare the filling. In a medium bowl, mix together the creamy peanut butter and whipped topping until smooth and fluffy. The whipped topping lightens the peanut butter and makes for an airy, mousse-like filling.
Step 6: Unroll and Fill the Cake
Once the cake is fully cooled, gently unroll it. Don’t worry if the edges curl slightly. Spread the peanut butter filling evenly across the cake’s surface using an offset or rubber spatula. Sprinkle 1 cup of chopped Reese’s peanut butter cups over the filling.
Step 7: Roll the Cake Again
Now carefully roll the cake back up, this time without the parchment paper. Roll it firmly but gently, then place it seam-side down on a serving platter or tray. This final roll should be tighter now that the cake has cooled and softened.
Step 8: Chill and Garnish
Refrigerate the roll for at least 1 hour so the filling sets and the cake holds its shape when sliced. Right before serving, top the roll with additional whipped topping and a generous sprinkle of chopped Reese’s peanut butter cups. This adds a beautiful finishing touch and extra crunch.
Recommendations for Recipe Success
- Roll the cake while it’s still warm: This is critical. Rolling it hot allows it to mold to the spiral shape without cracking.
- Use parchment paper generously: It prevents sticking and makes transferring and rolling easier.
- Cool completely before filling: Adding filling to a warm cake will cause it to melt and run.
- Chill before slicing: A cold roll slices cleanly and maintains its spiral structure.
- Use full-fat whipped topping: It helps the filling stay firm and creamy without becoming runny.
Serving and Storage Tips
Serving Suggestions
- Slice with a serrated knife for clean edges.
- Serve cold or slightly chilled for the best texture.
- Pair with coffee, milk, or a scoop of vanilla ice cream.
Storage Tips
- Refrigerate: Store leftovers in an airtight container in the refrigerator for up to 3 days.
- Freeze: Wrap individual slices in plastic wrap and place in a freezer-safe container. Freeze for up to 2 months. Thaw overnight in the fridge before serving.
- Do Not Leave Out: Due to the creamy filling, avoid leaving the roll cake at room temperature for more than 2 hours.
Frequently Asked Questions
1. Can I use homemade chocolate cake instead of a box mix?
Yes, absolutely. Just make sure the cake is thin enough to roll and has a soft, flexible texture to prevent cracking.
2. Can I use crunchy peanut butter for the filling?
You can, but the filling won’t be as smooth. For a creamier texture, stick with creamy peanut butter, or mix both types for added texture.
3. Is there a substitute for whipped topping?
You can use homemade whipped cream, but be sure it’s stabilized with powdered sugar or gelatin so it doesn’t deflate or become watery.
4. What’s the best way to slice the roll cake?
Use a serrated knife and clean it with a warm, damp cloth between slices. This helps maintain clean edges and avoids smearing the filling.
5. Can I make this cake a day ahead?
Yes! This cake actually improves with time. Assemble it a day before, store it in the fridge, and garnish just before serving.
Conclusion
This Reese’s Peanut Butter Cup Roll Cake is the dessert you didn’t know you needed. It combines simplicity with a stunning presentation and unbeatable flavor. With a soft, rich chocolate sponge, creamy peanut butter whipped filling, and crunchy candy bits, every bite delivers a satisfying mix of textures and tastes.
Even if you’ve never made a roll cake before, this recipe is accessible and forgiving. It’s perfect for birthdays, holiday tables, or just a weekend indulgence. Once you master this roll cake, you’ll want to make it again and again — and trust us, your friends and family will ask you to.
Give it a try today and create a new dessert tradition that everyone will remember!
